CONVENTIONS
QuickTIPs (and Links) are highlighted in blue.
Permission-based items are highlighted in red.
System navigation is italicized.
BILLING ENTRY
CurrentTrack’s Billing Entry feature enables you to record Invoice information for a job, including its Number, Subject, Amount, and any additional Comments. This information can be entered during the execution of a job (i.e. a “progress billing”) or upon its completion (i.e. a “final billing”). As many Entries as required may be entered for a job.
BILLING ENTRY: MANUAL CREATION
To create a Billing Entry, go to Clients & Jobs — Client — Job One Sheet — I Want To: Create Billing Entry. You can also click ![]() at the top of the screen.
at the top of the screen.
TIP: When navigating via the ![]() menu, the Job field on the initial Create screen is content-sensitive. Enter as many job Title keywords as possible to narrow down the list more quickly and eliminate unnecessary scrolling.
menu, the Job field on the initial Create screen is content-sensitive. Enter as many job Title keywords as possible to narrow down the list more quickly and eliminate unnecessary scrolling.
Fill in the appropriate fields and click Submit. The information will appear in the job’s Billing History and its Financial Report.
BILLING ENTRY: VIA QUICKBOOKS CONNECTOR
If your agency is a QuickBooks Connector user, you don’t need to create a Billing Entry manually, as outlined above. Once you perform a Sync, via the Connector, the job’s CurrentTrack Billing History will automatically mirror the Invoice that appears in QuickBooks, via a corresponding Billing Entry.
NOTE: Modifications made to existing Billing Entries (e.g. Amount modified) will not be reflected in their corresponding QuickBooks Invoices.
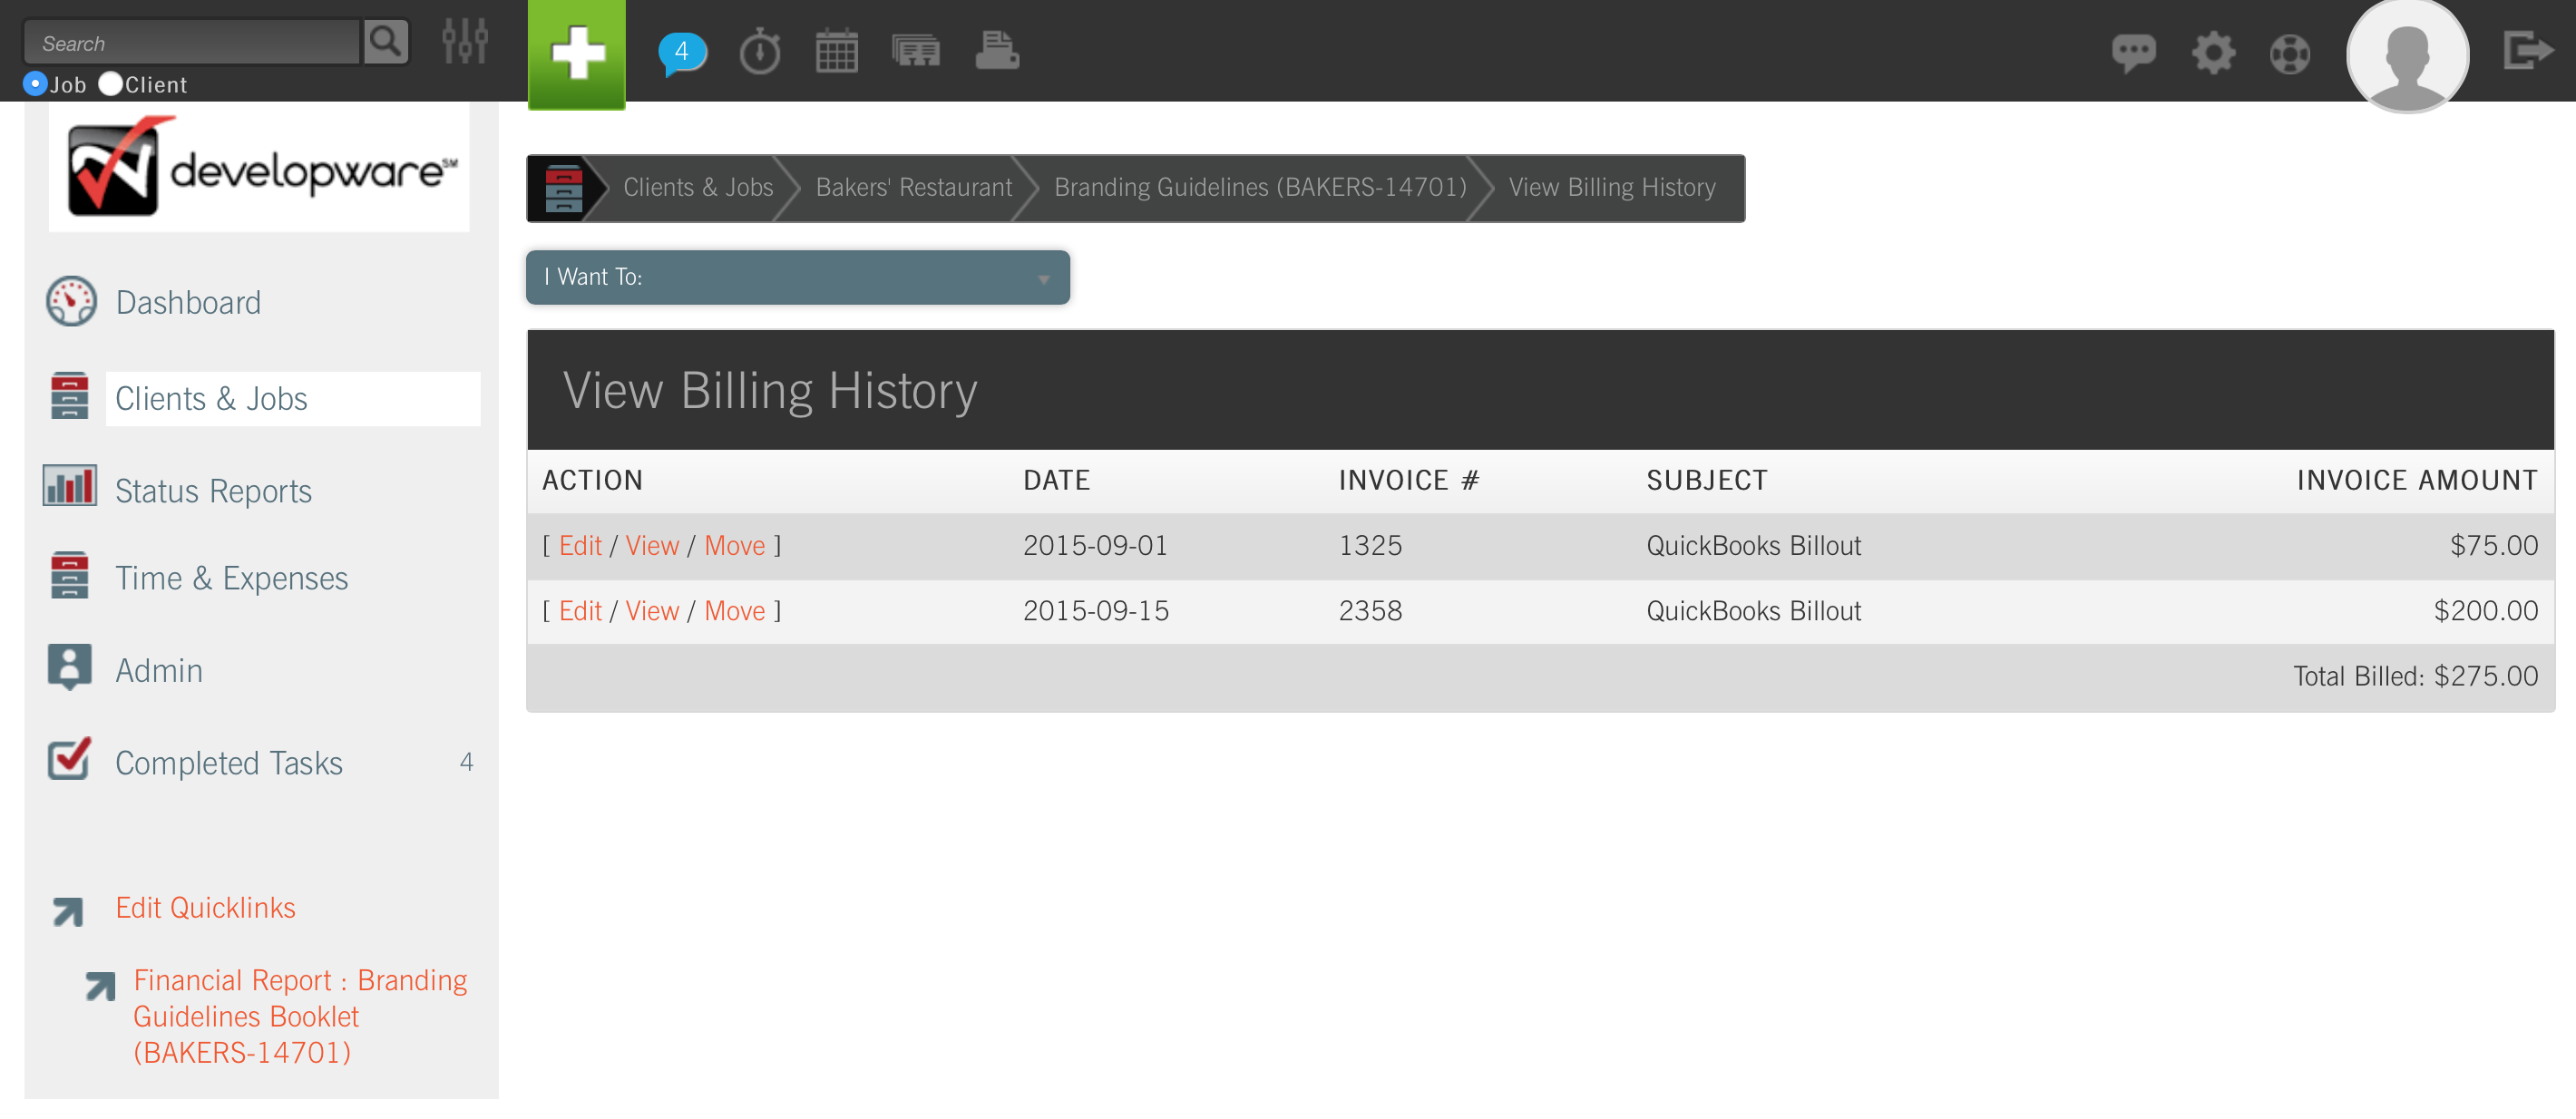
VIEWING A BILLING ENTRY
To View a Billing Entry, go to Clients & Jobs — Client — Job One Sheet — I Want To: View Billing History.
Click on the View link beside the Billing Entry to review its details. To view its Printer Friendly version, simply click the printer icon located at the top of the screen, once inside the document itself.
MOVING A BILLING ENTRY
Should you happen to misfile a Billing Entry, simply go to Clients & Jobs — Client — Job One Sheet — I Want To: View Billing History.
Click the Move link beside the Entry. Fill in the correct Job Number, or choose it from the pop-up box to the right of the field, and click Move Document.
DELETING A BILLING ENTRY
To delete a Billing Entry, go to Clients & Jobs — Client — Job One Sheet — I Want To: View Billing History.
Click the Delete link beside the document. At the prompt, click OK. A Billing Entry can also be deleted from within the document itself. Simply click its Edit link and, once inside, click Delete under Application Options, at the bottom of the page.
SCENARIO
We have a couple of Clients that we pre-bill. How can I record this information in CurrentTrack?
To record pre-billing information, simply enter a Billing Entry with the following criteria:
Date Entered: [date the bill is being sent]
Invoice Number: [number generated by your accounting program]
Subject: Pre-bill [any additional distinguishing criteria (e.g. 1, 2; August 2017, etc.)]
Invoice Amount: [refer to your accounting program]
Comments: [anything you’d like to note about the bill (e.g. “We’ll pre-bill in three installments.”]
CC: [Account Executive, for example]
Once you submit the Entry, its dollar figure will be reflected in the [job] Financial Report, under the Billed Amount to Date field. The Unbilled Amount field will most likely reflect a figure of $0.00 as you wouldn’t yet have incurred Time and Expenses for the job.
All pre-bills filed via a Billing Entry will pull through to other financial reports as well (e.g. Work In Progress, Gross Income, Financial Report Summary, etc.), giving you an accurate picture of what’s been billed on each job.